DIY Projects
I will post photos of my actual projects once I start/complete them. So far these are my ideas and inspirations.
Invites
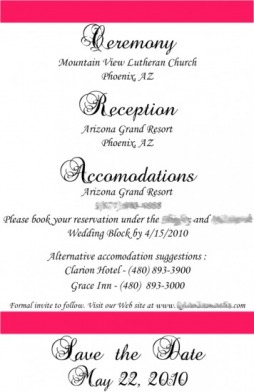
Save the Dates


magnet - we wound up not using this though
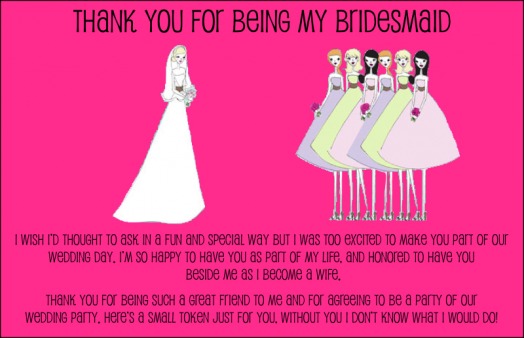
Bridesmaid Cards
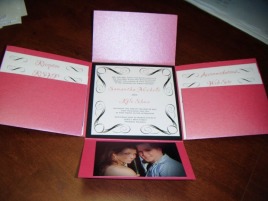
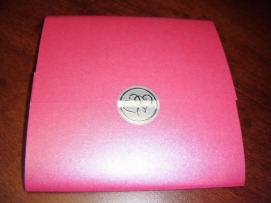
Card Box
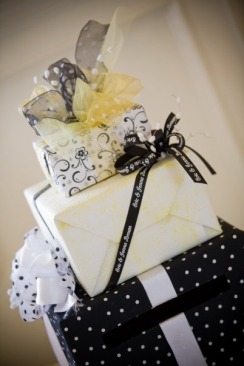
Picture from WBC bride hotpink
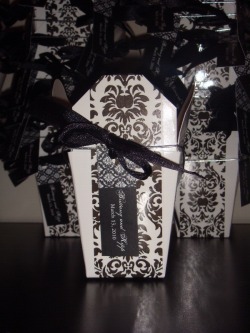
Candy Favor Box
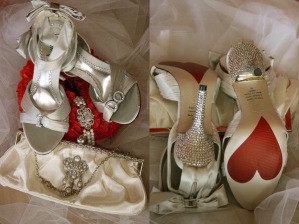
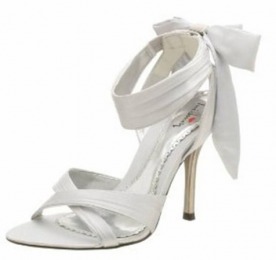
Wedding Shoe Bling
Supplies:
-shoes
-clear thread
-18mm rhinestone letter charms (from Petco)
-3mm round flatback crystals
-tweezers
-strong glue
Directions:
To attach the "I DO" letter charms to the front of your shoes you just need to showcase some creative sewing. Position your letter charms in the center of the shoe front. The letter charms have a slider bar behind the letter because they are meant to go on kitty or doggie collars. So if your shoes are like mine, you can just sew around the top part of the slider bar and then the bottom to secure them in place. If you have another type of shoe that makes the last step difficult you will have to physically sew the charms onto the shoe. Voila!
To create the blinging heel, all you need a very strong adhesive, some tweezers and some 3mm flat back rhinestones. Start by spreading a thin line of glue horizontally along the bottom of the heel. Then you'll have to work fast to ensure strongest adhesion. Pick up one rhinestone at a time with your tweezers and place it on the glue line. Continue this until you have created your first line of bling. Then simply continue those steps as you work your way up the heel until it's completely covered. Once you've finished both heels, allow them 1-2 days to completely air dry.
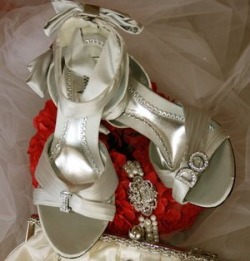
DIY Idea and Photo from WBC Bride nickim - she got it from HERE
-shoes
-clear thread
-18mm rhinestone letter charms (from Petco)
-3mm round flatback crystals
-tweezers
-strong glue
Directions:
To attach the "I DO" letter charms to the front of your shoes you just need to showcase some creative sewing. Position your letter charms in the center of the shoe front. The letter charms have a slider bar behind the letter because they are meant to go on kitty or doggie collars. So if your shoes are like mine, you can just sew around the top part of the slider bar and then the bottom to secure them in place. If you have another type of shoe that makes the last step difficult you will have to physically sew the charms onto the shoe. Voila!
To create the blinging heel, all you need a very strong adhesive, some tweezers and some 3mm flat back rhinestones. Start by spreading a thin line of glue horizontally along the bottom of the heel. Then you'll have to work fast to ensure strongest adhesion. Pick up one rhinestone at a time with your tweezers and place it on the glue line. Continue this until you have created your first line of bling. Then simply continue those steps as you work your way up the heel until it's completely covered. Once you've finished both heels, allow them 1-2 days to completely air dry.
DIY Idea and Photo from WBC Bride nickim - she got it from HERE
Cupcake Stand
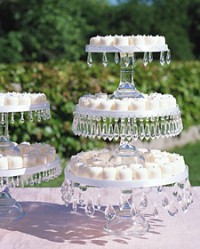
Directions
For each band shown here, you'll need double-sided tape and single-faced satin ribbon, both cut to the circumference of the stand. Lay the crystals out beforehand to determine a spacing that works for your stand.The two treatments on the left use inexpensive plastic chandelier beads. Press the stem of each bead onto the double-sided tape. Finish by laying a piece of ribbon over the stems.The three treatments on the right are made with glass and crystal chandelier beads. For the swag style, first string a length of heavy thread with silver seed beads. Tack the beaded thread to the end of your ribbon, add a chandelier bead, tack again, and repeat. The second set comes with hooks that slip into the ribbon. Or you can sew individual crystals to the ribbon, leaving long loops of thread so they dangle. Affix ribbon to stand using tape."
DIY Item from: http://www.weddingbycolor.com/porcelainbride
Hurrican Centerpieces
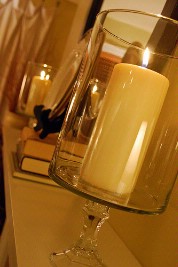
2 6" diameter glass containers from Walmart ... $3.00 each
2 glass candle sticks from the Dollar Tree ... $1.00 each
2 pillar candles from Walmart ... $2.88 each
Gorilla Glue
Directions: Using the Gorilla Glue, adhere candle stick to bottom center of large container. Use math to figure out the center and position accordingly. Let dry for awhile. Gaze and admire.
DIY Item and photo from WBC Bride fijipearl
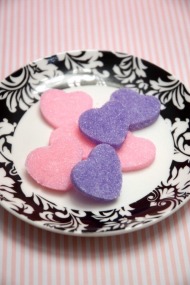
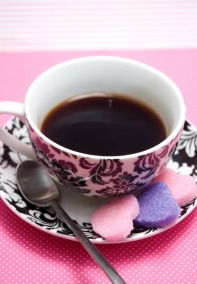
Sugar Cubes
Equipment:
small bowls
greaseproof paper (parchment/wax paper)
small heart-shaped cookie cutter
teaspoon
granulated sugar
food colors
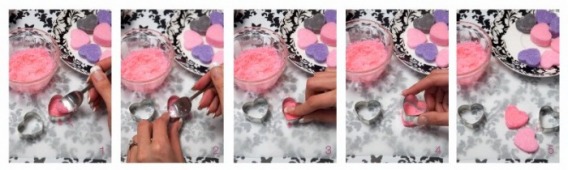
1. Prepare bowl with sugar. Then add a tiny drop of food color to the sugar, and a little water to make it damp. Mix until evenly colored.
2. On a piece of greaseproof paper, push a small amount of sugar firmly into the heart cutter (see 1) and level the top with a spoon (see 2). Carefully lift off the cutter and let dry (see 3&4)**
3. Repeat until all the sugar us used up.
** note: make sure that you do not try and move the cubes until they are dry, about 1/2 hour
DIY Idea and Picture from WBC Bride hotpink
small bowls
greaseproof paper (parchment/wax paper)
small heart-shaped cookie cutter
teaspoon
granulated sugar
food colors
1. Prepare bowl with sugar. Then add a tiny drop of food color to the sugar, and a little water to make it damp. Mix until evenly colored.
2. On a piece of greaseproof paper, push a small amount of sugar firmly into the heart cutter (see 1) and level the top with a spoon (see 2). Carefully lift off the cutter and let dry (see 3&4)**
3. Repeat until all the sugar us used up.
** note: make sure that you do not try and move the cubes until they are dry, about 1/2 hour
DIY Idea and Picture from WBC Bride hotpink
Standard Knottie Disclaimer
I started collecting pictures before I knew what to do with them. If I have used your pictures and have not given you credit, email me and I will do so.
